
A home renovation can transform how your house looks, functions, and feels—but the work should not begin with demolition.
The most important decisions happen before the first wall comes down: defining the scope, setting a realistic budget, completing the design, choosing the right contractor, confirming permits, and establishing how changes will be handled once construction begins.
The home renovation process generally moves through nine stages:
- Define your goals and scope
- Set the renovation budget
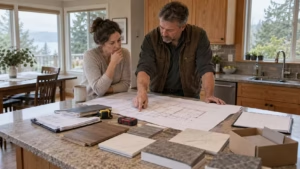
- Complete the design and material selections
- Hire the right professionals
- Secure permits and finalize the project plan
- Prepare the home for construction
- Complete demolition and construction
- Monitor progress, costs, and changes
- Complete inspections, deficiencies, and final handover
The exact timeline depends on the size of the renovation, the condition of the property, permit requirements, structural changes, material lead times, and the number of rooms involved. A single bathroom renovation may be measured in weeks, while a full-home renovation can take several months. For example, Arani Construction estimates a typical full-home renovation in North Vancouver at roughly six to nine months from initial consultation to handover, depending on scope and permitting.
Understanding each stage before you commit to construction makes it easier to protect your budget, make decisions at the right time, and avoid unnecessary rework.
9 Steps in the Home Renovation Process

Step 1: Define Your Renovation Goals and Scope
Start by deciding what you want the renovation to accomplish, not which finishes you want to buy.
A strong project scope identifies the problems the renovation needs to solve. You may need more kitchen storage, a better family layout, an additional bathroom, improved accessibility, updated electrical and plumbing systems, or a complete modernization of an older home.
Separate your priorities into three categories:
- Must-haves: changes required for function, safety, structural performance, or daily living
- High-priority upgrades: improvements that significantly affect comfort or usability
- Nice-to-haves: features that can be reduced or removed if the budget becomes tight
The scope should also clarify whether you are planning a cosmetic update, a single-room renovation, several connected spaces, or a complete structural remodel.
This distinction matters because a project involving load-bearing walls, relocated plumbing, new electrical systems, or changes to the building envelope requires considerably more design, coordination, and permitting than replacing flooring and finishes.
For projects involving several rooms or major structural changes, reviewing what is included in a professionally managed full home renovation service can help you understand how the individual parts of the project fit together.
Before moving forward, make sure you can clearly answer:
- Which rooms are being renovated?
- What problems need to be solved?
- Will the layout change?
- Will walls, plumbing, electrical, or HVAC systems be affected?
- Which features are essential?
- When would you ideally like the project completed?
A clear scope gives designers and contractors something concrete to estimate and helps prevent major changes after construction starts.
Step 2: Set a Realistic Renovation Budget
A renovation budget should account for more than visible finishes.
Your total project budget may include:
- Design and architectural work
- Engineering, if required
- Permit and inspection costs
- Labour
- Demolition and disposal
- Construction materials
- Cabinets and millwork
- Flooring and tile
- Plumbing fixtures
- Lighting and electrical fixtures
- Appliances
- Painting and finishing
- Project management
- Temporary accommodation or storage
- Contingency funds
The biggest budgeting mistake is using the entire available amount for the planned scope and leaving nothing for uncertainty.
Renovations frequently expose conditions that were impossible to confirm before opening walls or floors. Older plumbing, outdated wiring, water damage, uneven subfloors, structural deficiencies, or previous unpermitted work can change what needs to be done.
A commonly used planning approach is to reserve roughly 10% to 20% of the construction budget for contingency, with higher reserves being more appropriate for older homes, major structural work, or renovations involving substantial concealed conditions. This is a planning allowance rather than a guarantee of additional spending.
Keep this contingency separate from upgrades you already know you want. A contingency fund is intended for genuine project uncertainty, not for expanding the scope halfway through construction.
Your contractor’s estimate should also make it clear which items are included, excluded, or treated as allowances. Comparing two renovation quotes based only on the final price can be misleading if their scopes are different.
Step 3: Create the Design and Select Materials
Design is where the renovation becomes buildable.
This stage converts your priorities into layouts, drawings, dimensions, material specifications, fixture selections, and construction details.
Depending on the project, design work may include:
- Floor plans
- Kitchen or bathroom layouts
- Lighting plans
- Electrical layouts
- Cabinetry drawings
- Structural details
- Flooring selections
- Tile layouts
- Countertops
- Plumbing fixtures
- Paint colours
- Doors and hardware
- Appliances
- Custom millwork
Whenever possible, make major material decisions before construction begins.
Late selections can create a chain reaction. A delayed tile choice can affect waterproofing details and installation dates. Changing an appliance may alter cabinet dimensions or electrical requirements. Selecting a different faucet after plumbing rough-in may require additional work.
Material lead times also matter. Custom cabinetry, specialty stone, windows, doors, plumbing fixtures, and imported finishes may need to be ordered well before installation.
The goal is not simply to choose attractive materials. Every selection should work with the design, budget, installation requirements, maintenance expectations, and project schedule.
Step 4: Hire the Right Renovation Professionals
The right renovation team depends on the complexity of the project.
A small cosmetic renovation may need only a contractor and individual trades. A structural or full-home renovation may involve a general contractor, architect or designer, structural engineer, electrician, plumber, HVAC specialists, millworkers, and other licensed trades.
When evaluating a renovation contractor, look beyond the initial price.
Review:
- Relevant renovation experience
- Licensing and insurance
- WorkSafeBC coverage where applicable
- Local project experience
- Recent completed work
- References or verified reviews
- Level of detail in the proposal
- Project management process
- Communication expectations
- Payment schedule
- Warranty terms
- Change-order procedure
- Responsibility for permits and inspections
A detailed proposal should make it possible to understand what you are actually buying.
If you are comparing contractors, Arani Construction’s guide on how to choose the right renovation contractor provides additional questions to consider before signing a contract.
Pay particular attention to how changes are documented. Any adjustment affecting scope, price, or schedule should be recorded in writing and approved before the additional work proceeds.
Clear change-order rules are one of the simplest ways to prevent misunderstandings during construction.
Step 5: Secure Permits and Finalize the Project Plan
Do not assume every renovation can begin immediately after signing a contract.
Depending on the property and the planned work, you may need building, electrical, plumbing, gas, development, or other approvals.
In the City of North Vancouver, building permits can apply to residential renovations and interior alterations, while electrical, plumbing, gas, and other permits may also be required depending on the scope. The City also requires inspections at different stages to confirm that construction follows approved plans and applicable regulations.
For strata properties, another layer of approval may apply. Renovation packages can require drawings, contractor documentation, insurance information, work-hour restrictions, elevator bookings, flooring specifications, and written strata approval before work begins. The City of North Vancouver also maintains separate information for residential renovations in strata buildings.
Permit requirements vary by municipality and project type, so confirm the requirements for your specific property instead of relying on assumptions from a previous renovation.
Before construction starts, your final project plan should establish:
- Approved drawings
- Final scope of work
- Material selections
- Contract price
- Allowances and exclusions
- Construction schedule
- Payment milestones
- Permit responsibilities
- Inspection stages
- Site access
- Waste removal
- Working hours
- Communication process
- Change-order procedure
For homeowners in Vancouver and the North Shore, Arani’s home renovation services in Vancouver provide additional context on locally managed renovation projects, including design coordination, permits, and construction.
Step 6: Prepare Your Home for Construction
Construction will be easier to manage if the house is prepared before demolition begins.
Remove furniture, artwork, electronics, valuables, clothing, and personal belongings from active construction areas. Items remaining nearby should be protected from dust and accidental damage.
Your contractor should establish site protection appropriate to the project, which may include:
- Floor protection
- Dust barriers
- Temporary partitions
- Protected access routes
- Waste and debris areas
- Material storage zones
- Ventilation or dust-control measures
You also need to plan how the renovation will affect everyday life.
A kitchen renovation may temporarily remove your main cooking area. A bathroom renovation may be manageable if another bathroom remains available. A full gut renovation may make temporary relocation the more practical option.
For major projects, decide in advance:
- Whether you will stay in the home
- Which areas must remain accessible
- Where pets will stay
- How deliveries will enter the property
- Whether furniture requires off-site storage
- How parking and contractor access will work
- How neighbours will be affected by noise or deliveries
Preparing these details early reduces disruption once crews arrive.
Step 7: Complete Demolition and Construction Work
Once approvals are in place and the site is prepared, physical construction begins.
The exact order varies by renovation, but major residential projects typically move from destructive and structural work toward increasingly delicate finishes.
A common sequence is:
- Site protection and demolition
- Structural work and framing
- Plumbing, electrical, and HVAC rough-ins
- Required rough-in inspections
- Insulation and air or vapour control work
- Drywall
- Waterproofing and tile preparation
- Painting and initial finishes
- Cabinetry and millwork
- Flooring
- Countertops
- Plumbing and electrical fixtures
- Appliances
- Trim, doors, and hardware
- Final painting and touch-ups
The guiding principle is simple: complete work hidden behind walls before closing them, and complete heavy or disruptive construction before installing vulnerable finishes.
For example, installing finished flooring before major structural or drywall work is completed creates unnecessary risk of damage. Similarly, walls should not be closed until required plumbing, electrical, mechanical, structural, and municipal inspections have been completed.
Large projects may divide this work into several phases. Arani’s North Vancouver full-home renovation framework, for example, separates demolition and structural work, mechanical rough-ins, insulation and drywall, finishes and millwork, fixtures, and final inspection.
Step 8: Manage Progress, Costs, and Changes
Even a well-planned renovation needs active management once construction starts.
Homeowners should receive regular information about:
- Work completed
- Upcoming work
- Decisions required
- Inspections
- Material deliveries
- Schedule changes
- Budget changes
- Unexpected conditions
Avoid approving important changes through informal conversations alone.
If the contractor discovers an unforeseen condition or you request an upgrade, the change order should identify:
- What is changing
- Why the change is required
- Additional or reduced cost
- Schedule impact
- Any effect on other parts of the project
Only then should the revised work proceed.
Keep a simple record of the original contract amount, approved change orders, payments made, outstanding balances, and remaining contingency.
It is also useful to distinguish between a genuine unforeseen condition and an owner-requested upgrade.
For example, replacing deteriorated framing discovered after demolition may be an unforeseen condition. Deciding to upgrade to more expensive countertops after the original selection has already been ordered is a scope change.
Treating the two differently gives you a much clearer picture of why the budget has changed.
If you want to see the types of finished spaces that can result from properly coordinated renovation work, browse Arani Construction’s completed renovation projects.
Step 9: Complete Final Inspections and the Punch List
A renovation is not complete simply because the major construction work has ended.
Before final handover, the contractor and homeowner should walk through the project and document incomplete work, deficiencies, adjustments, and cosmetic touch-ups.
This is commonly called a punch list or deficiency list.
Typical items may include:
- Paint touch-ups
- Cabinet or door adjustments
- Missing hardware
- Sealant corrections
- Minor tile or grout repairs
- Fixture adjustments
- Electrical device testing
- Plumbing fixture testing
- Appliance checks
- Final cleaning
Required municipal inspections should also be completed and permits closed where applicable.
The City of North Vancouver confirms that inspections occur at different phases of permitted projects to verify compliance with approved plans, codes, and regulations.
At handover, collect relevant documentation such as:
- Final inspection records
- Warranty information
- Appliance manuals
- Product information
- Paint colours
- Extra tile or flooring
- Maintenance instructions
- Contractor warranty details
- Final invoices and payment records
For a major renovation, keep these documents together. They can be valuable for maintenance, future renovations, warranty claims, and eventual property sales.
Conclusion
The most successful home renovation process is not the one that moves into demolition fastest. It is the one that resolves the most important questions before demolition begins.
Define the scope first. Build a realistic budget with contingency. Complete the design and material selections. Hire professionals whose proposal and process are clear. Confirm permits and inspections. Then move through construction in the correct sequence while documenting costs and changes along the way.
That preparation gives you much greater control over the three variables homeowners care about most: the finished result, the project budget, and the renovation timeline.
If you are planning a renovation in North Vancouver, West Vancouver, or elsewhere in Greater Vancouver, working with a contractor familiar with local building types, permits, and inspection requirements can simplify the process considerably. You can review the areas served by Arani Construction or request a project consultation to discuss the scope, budget, and practical next steps for your home.
Frequently Asked Questions
1. How long does a home renovation usually take?
A home renovation can take anywhere from several weeks to many months depending on its scope. Arani Construction estimates bathroom renovations at roughly 3–5 weeks, kitchens at 6–10 weeks, basement projects at 8–14 weeks, and full-home renovations at approximately 4–9 months in the Vancouver market. Permit processing can extend the pre-construction timeline.
2. What is the correct order for renovating a house?
A typical renovation starts with planning, budgeting, design, contractor selection, and permits. Construction then generally progresses through demolition, structural work, plumbing/electrical/HVAC rough-ins, inspections, insulation and drywall, cabinetry and finishes, flooring, fixtures, final inspections, and the punch list.
The exact sequence should be adjusted to the design and building conditions, but work behind walls should generally be completed and inspected before walls are closed and finish materials are installed.
3. How much should you budget for unexpected renovation costs?
A 10%–20% contingency is a useful planning range for many substantial renovations. Projects with limited uncertainty may require less, while older homes, full gut renovations, structural changes, and projects involving significant hidden conditions may justify a larger reserve.
Keep contingency separate from optional upgrades so it remains available if genuine unexpected work is discovered.
4. Do you need permits for a home renovation?
It depends on the location and scope of work. Cosmetic changes may require little or no permitting, while structural changes, additions, interior alterations, electrical work, plumbing, gas work, and other significant renovations can require one or more permits.
In North Vancouver, residential renovations and interior alterations can require building permits, and separate trade permits may apply depending on the work. Always confirm the requirements with the applicable municipality before construction begins.